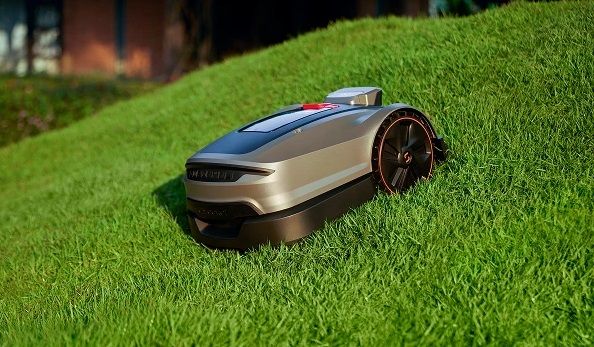
The advent of robot lawn mowers without perimeter wires has dramatically simplified the setup process, transforming what was once a laborious task into a relatively quick and intuitive experience. Gone are the days of burying or pegging down hundreds of meters of wire. Instead, these advanced machines leverage sophisticated technologies like RTK-GPS or vision-based navigation to define virtual boundaries. This guide will walk you through the typical steps involved in installing a wire-free robot lawn mower, ensuring a smooth transition to effortless lawn care.
1. Unboxing and Initial Placement
The first step is to unpack your new robot mower and its components, which typically include the mower itself, a charging station, and for RTK-GPS models, a base station or reference antenna.
- Choose a Charging Station Location: Select a spot that is relatively flat, has access to a power outlet, and is within your Wi-Fi range (if applicable). It should also be in an area where the mower can easily approach and exit. For RTK-GPS models, ensure the charging station isn’t heavily obstructed by buildings or dense trees, as it often needs a clear view of the sky or to be near the RTK base station.
- Install the Charging Station: Secure the charging station to the ground according to the manufacturer’s instructions. This usually involves screwing it down or using ground pegs to prevent movement. Connect it to a power source.
- Set up the RTK Base Station (if applicable): If your mower uses RTK-GPS, you’ll need to install its base station. This is often mounted on a pole or a high point (like a roof or shed) with an unobstructed view of the sky. This base station is crucial for providing the mower with precise location data. Follow the manufacturer’s specific guidelines for optimal placement and connection.
2. Connecting to the App and Network
Modern robot lawn mower without perimeter wire are heavily reliant on smartphone apps for their setup and operation.
- Download the App: Download the manufacturer’s dedicated app to your smartphone or tablet.
- Pair the Mower: Follow the in-app instructions to pair your robot mower with your device. This often involves Bluetooth for initial connection, then connecting the mower to your home Wi-Fi network. For cellular-enabled models, ensure the cellular service is activated.
- Create an Account: You’ll likely need to create a user account within the app to manage your mower.
3. Mapping Your Lawn (Creating Virtual Boundaries)
This is the core difference from wired systems and where the “wire-free” magic happens.
- Initial Drive/Walk-Through: The app will guide you through the process of mapping your lawn. This typically involves:
- Driving the Mower: Using the app as a remote control, you “drive” the mower along the desired perimeter of your lawn, defining the outer boundary. The mower records these coordinates.
- Walking with the Mower: Some systems might require you to physically walk the mower along the perimeter while it records the boundaries.
- Define “No-Go” Zones: Once the main boundary is set, you can use the app to mark “no-go” zones around obstacles you want the mower to avoid (e.g., flower beds, ponds, children’s play areas, delicate shrubs). This is done by drawing shapes on the virtual map in the app.
- Multi-Zone Mapping (if applicable): If your lawn has multiple distinct areas connected by narrow passages, the app will allow you to define these separate zones and how the mower should travel between them.
4. Initial Configuration and Scheduling
With the boundaries set, you can now configure the mower’s operation.
- Set Cutting Height: Adjust the cutting height to your desired level, often done electronically via the app.
- Create Mowing Schedule: Use the app to set up a regular mowing schedule. You can often define specific days, times, and even different schedules for different zones.
- Review Settings: Check other settings like rain sensor sensitivity, anti-theft PIN, and any other preferences.
5. First Mow and Monitoring
Once everything is set up, it’s time for the first autonomous mow.
- Supervise the First Few Mows: It’s highly recommended to supervise the mower during its initial runs. This allows you to observe how it navigates, identify any areas it struggles with, or fine-tune virtual boundaries and no-go zones.
- Check for Uncut Areas: After the first few mows, inspect your lawn for any missed spots or areas where the mower gets stuck. Adjust the virtual map or add/modify no-go zones as needed.
- Monitor App Alerts: Pay attention to any notifications or alerts from the app, which can indicate issues or provide status updates.
Conclusion
Installing a wire-free robot lawn mower is a streamlined process that eliminates the complexities of physical wiring, offering unprecedented flexibility in lawn management. By following these steps, you can quickly set up your autonomous mower and enjoy the convenience of a perfectly manicured lawn with minimal effort.

